MS Word 2007 Mail Merge मेल मर्ज क्या है
MS Word 2007 Mail Merge
MS Word 2007 Mail Merge – एमएस वर्ड में मेल मर्ज एक महत्वपूर्ण विशेषता है जो सामूहिक पत्राचार के लिए उपयोग होता है. सामूहिक पत्राचार का अर्थ क्लाइंट को उनके एड्रेस पर मेल भेजने से है. मेल मर्ज का उपयोग फॉर्म, लेटर, इंवेलप्स, लेबल को एक से अधिक पते पर मेल भेजने के लिए होता है. मेल मर्ज में दो फाइल को आपस में मर्ज किया जाता है मेल मर्ज का 6 स्टेप होता है. Mail merge is an important feature in MS Word which is used for mass correspondence. Mass correspondence refers to sending mail to the client at their address. Mail merge is used to send form, letter, envelope, label to more than one address. In mail merge, two files are merged together, there are 6 steps of mail merge.
Step – 1 Create Document
- Mailings Tab पर क्लिक करे. click on mailings Tab.
- start mail merge ग्रुप पर start mail merge पर क्लिक करें. click on start mail merge on start mail merge group.
- ड्रॉप डाउन सूची खुल जाएगी. drop down list will be open.
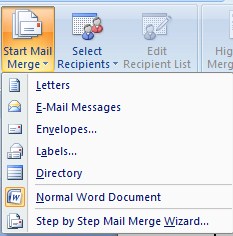
- मेल मर्ज किसके लिए किया जाना है जैसे लेटर, इंवेलप, लेबल्स, डायरेक्टरी जैसे ऑब्जेक्ट को चयन करे. Select the object for which the mail merge is to be done like Letter, Envelope, Labels, Directory.

Step – 2 Select Recipients
- Select Recipients पर क्लिक करें. Click on Select Recipients.
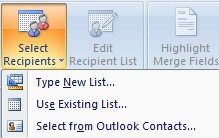
- Type A New List ऑप्शन पर क्लिक करें इस ऑप्शन पर क्लिक करने पर New List क्रिएट करने के लिए डायलॉग बॉक्स ओपन होता है. Click on the Type A New List option, clicking on this option opens the dialog box to create a new list.
- यदि आप अपने आप से एक डेटाबेस बनाना चाहते हैं, तो टाइप ए न्यू लिस्ट विकल्प पर क्लिक करें, इस विकल्प पर क्लिक करने से एक नई सूची बनाने के लिए डायलॉग बॉक्स खुल जाता है. If you want to create a database by yourself, then click on the Type A New List option, clicking on this option opens the dialog box to create a new list.
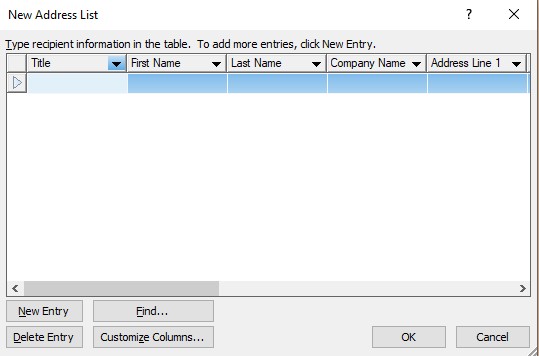
- इस डायलॉग बॉक्स पर Customize Columns पर क्लिक कर डाटाबेस के लिए फील्ड बनाये. Click Customize Columns on this dialog box to create a field for the database.
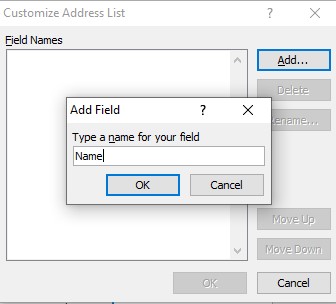
- Ok बटन पर क्लिक करें New Address List बॉक्स ओपन होगा. Click on the Ok button to open the New Address List box.
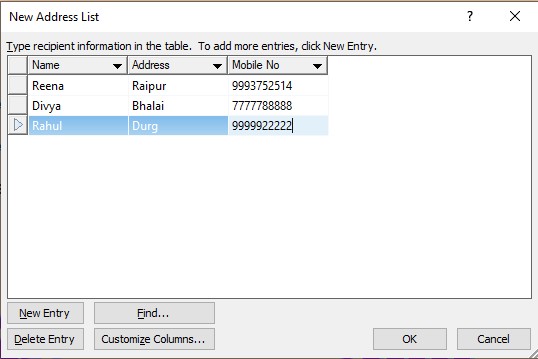
- इस डायलॉग बॉक्स में उन सभी फील्ड को एंट्री करें जिन्हें लेटर भेजना है एंट्री हो जाने के बाद ओके बटन पर क्लिक करने पर डेटाबेस लिस्ट को सेव करने के लिए एक डायलॉग बॉक्स ओपन होता है. Enter all the fields that have to send the letter in this dialog box, after the entry is done, clicking on the OK button opens a dialog box to save the database list.
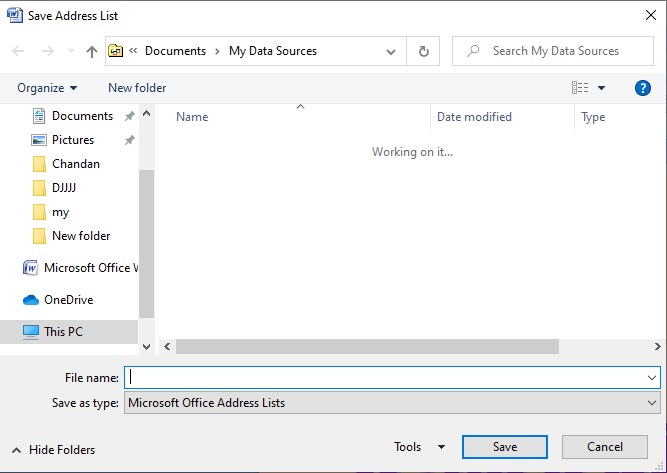
- इस डायलॉग बॉक्स पर फाइल का नाम देकर सेव बटन पर क्लिक करें. On this dialog box, name the file and click on the Save button.
Step – 3 Edit Recipients List
- Edit recipients list विकल्प पर क्लिक करे. Click on the Edit Recipients List option.
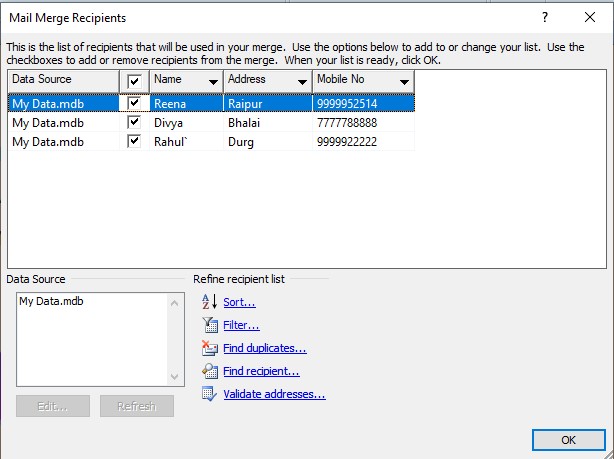
- इस डायलॉग बॉक्स में एड्रेस को shorting किया जा सकता है. डुप्लीकेट एड्रेस को सर्च कर डिलीट किया जा सकता है. In this dialog box, the address can be shorted, the duplicate address can be searched and deleted.
- Ok बटन पर क्लिक करे. Click the ok button.
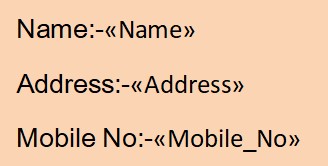
Step – 4 Insert Merge Field
- Write & insert fields ग्रुप पर insert merge field विकल्प पर क्लिक कर field को लेटर पर insert करे. On the Write & Insert Fields group, click on the insert merge field option and insert the field on the letter
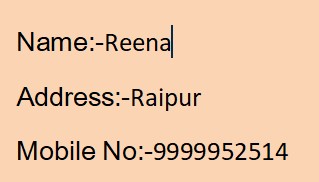
Step – 5 Preview Result
- Preview Result पर क्लिक करें. click on Preview Result.
Step – 6 Finish & Merge
- Finish & Merge पर क्लिक करें. Click on Finish & Merge.
- Edit individual document पर क्लिक करें. click on edit individual document .
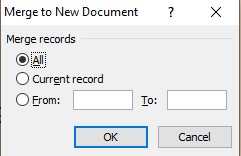
- Ok बटन पर क्लिक करें. click on ok button.
इन्हें भी देखें
यदि आपका कोंई विचार, सुझाव है तो हमें पोस्ट के निचे कमेंट सेक्शन में बेशक बताएं. जिससे हम वेबसाइट के कमियों को दूर करके और बेहतर बनाकर आपके सामने रख सकें. हमारे सभी पोस्ट को अपने दोस्तों के साथ शेयर करना न भूलें.
हमारे टेलीग्राम ग्रुप से जुड़ें
Telegram Group Click Here
- System Analysis in Software Engineering
- Computer Auxiliary Memory कंप्यूटर की सहायक मेमोरी Magnetic Drum, Magnetic Disk, Magnetic Tape
- Microsoft Publisher 2007 माइक्रोसॉफ्ट पब्लिशर 2007
- Insert Word Art in MS Word 2007| एम एस वर्ड में वर्ड आर्ट कैसे डालें ?
- MS Word 2007 Creating Chart in Word Documents वर्ड डॉक्यूमेंट में चार्ट कैसे बनायें
- MS Word 2007 Auto Text and Auto Correct एमएस वर्ड में ऑटो टेक्स्ट और ऑटो करेक्ट आप्शन क्या है